I occasionally need a larger disk in one of my VMWare VMs, and I always forget how to do it. I’m writing this post to save myself time the next time I need to do it!
Problem: You need a larger disk in one of your VMWare VMs.
Solution: Expand the disk first in VMWare, then inside the guest OS use Disk Management to extend the disk. (Of course this is somewhat centric to Windows 200*, Vista, or Windows 7 guest OSes. Steps 1-4 apply are the same regardless of your guest OS.)
Note: You can’t extend volumes in VMWare if the VM has any snapshots.
- Shut down the guest OS.
- Delete any snapshots of the system (VMWare | VM | Snapshots | Snapshot Manager | Delete)
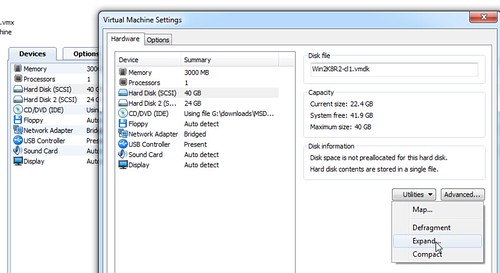
- From the VM’s settings screen, select the disk you need to resize, then use Utilities | Expand
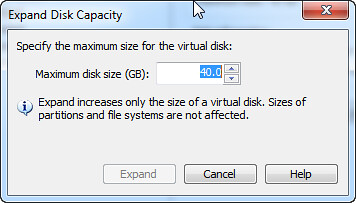
- Select the new disk size, click OK and go get lunch. It’s not a fast operation. (Impatient? Grips, dude. Think of what’s going on and listen to some Kenny while you do some yoga breathing exercises.)
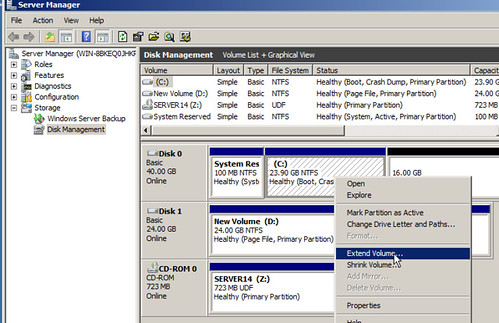
- Start up the guest OS, log on, and start server manager, then select Storage | Disk Management.
- Notice the partition you just expanded now shows extra available space. Right click the drive and select Extend.
- Walk through the wizard and confirm everything looks as it should

- Bask in the joy that you don’t have to fool around with building a new VM with a larger hard disk.


2 comments:
Just be sure to thin-provision your disk in the first place. Otherwise you can't extend the boot partition.
I am using windows 7 and with VM ware workstation, I have c drive only and i am trying to extend it to 65GB. so, after I go with your steps dont i have to use windows 7 DVD for repairing?
and will there be any effect to installed applications, i dont want to loose them?
please advise.
Post a Comment